import boto3
import s3fs
import pandas as pd
import os
bucket_name = 'X'
file_key = 'Y'AWS basics
Here I’ll show some basic functionality when working with AWS SageMaker, like: - Installing aws cli (configuring aws credentials, setting up conda environment, cloning GitHub repo) - Run SageMaker in VS-Code web UI - S3 access using s3fs and boto3 - How to restore deleted files on S3 bucket
1. AWS CLI
First we install awscli which is aws API (follow Link to install).
curl "https://awscli.amazonaws.com/awscli-exe-linux-x86_64.zip" -o "awscliv2.zip"
unzip awscliv2.zip
sudo ./aws/install
which aws
aws --versionCommands that expect aws credential will first look for KEY_ID and SECRET_ACCESS env variables, then local/global .credentials set up by
aws configure  # configures the credentials
aws s3 ls      # list all S3 buckets
aws sts get-caller-identity  # gets identity of a user
Set up new conda environment
SageMaker comes with many built-in Images that have many preloaded packages. Each image can support different Jupyter kernels (or equivalent conda environments).
First access Image terminal directly (navigate to the Launcher (click on “Amazon SageMaker Studio in the top left corner) and”Open Image terminal”)
conda env listwill print opt/conda only.
I had to install pip (for some reason it is not preinstalled):
apt-get update
apt-get install python-pip
Let’s create a new environment:
conda create -n  python=3.9
conda activate new_env
conda install jupyter
Let’s also add this environment as a Jupyter kernel:
jupyter kernelspec listipython kernel install --name new_env --userNow our custom environment is showing up.
Let’s install required packages in the new_env env:
pip install streamlit pandas polars
pip install torch torchvision torchaudio
pip install jupyter methodtools pytorch-lightning scikit-learn colorama libtmux onnxruntime openpyxl xlsxwriter matplotlib pulp
most of these are already preinstalled.
That’s it. Our kernel is now ready to be used.
There are more ways this can be done and I dabbled in Lifecycle Configuration but haven’t had success.
Clone GitHub repository
Best way to do this is via terminal (SageMaker has GitHub tab option but couldn’t make it run). We’ll show here one of the easy ways to do this is via Personal Access Token (there is ssh-key option as well). First, In Github, navigate to Personal Access Tokens, then in SageMaker Studio terminal clone the repo:
git clone <repo-URL>when asked for password enter the token that you just created!
To set up global git credentials, edit and run following lines:
git config --global user.email "you@example.com"
git config --global user.name "Your Name"
that way all the git changes will have your credentials.
2. Run SageMaker in VS-Code web UI
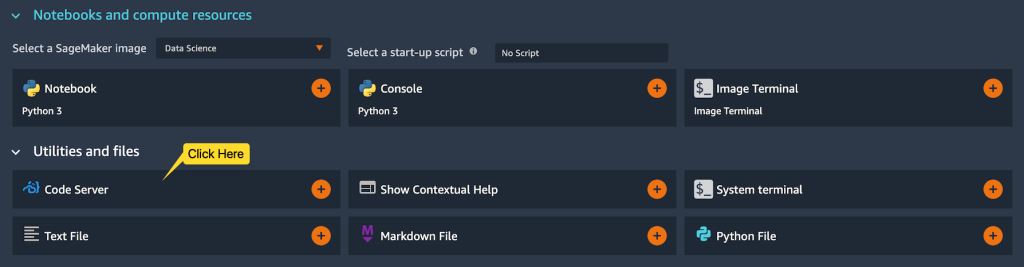
SageMaker Studio is the AWSs’ UI. If you prefer the VSCode look then you need to install somewhat awkwardly named “Code Server” (see installation instructions). You will now be able to run VS Code in a browser.
3. S3 access using s3fs and boto3
For s3 access one must set up credentials.
Accessing S3 files is not as straightforward as if having them locally since interaction has to go via AWS APIs. boto3 and s3fs are two libraries that have their own APIs. I find s3fs to be better since “S3Fs is a Pythonic file interface to S3. It builds on top of botocore”. Pandas is an exception and pd.read_csv just works. There is s3fs-fuse library (and apparently one with even higher performance called goofys, neither in pip) that kind of offer mounting s3 option, however, I ran into issues when trying to install them. Following are some examples:
Read into DataFrame
df = pd.read_csv(f's3://{bucket_name}/{file_key}')s3fs
s3 = s3fs.S3FileSystem(anon=False) # Set anon to True for public bucketsls
contents = s3.ls(bucket_name)
print(contents)
glob
s3.glob(f's3://{bucket_name}/**/a*.csv')download
# Specify local directory for downloaded file
local_directory = '/tmp/'
local_file_path = os.path.join(local_directory, 'Z')

# Ensure the local directory exists
os.makedirs(local_directory, exist_ok=True)

# Download CSV file
s3.download(f's3://{bucket_name}/{file_key}', local_file_path)

# Load CSV into Pandas DataFrame
df = pd.read_csv(local_file_path)

# Clean up downloaded file
# os.remove(local_file_path)
boto3
s3_client = boto3.client('s3')download
# Specify local directory for downloaded file
local_directory = '/tmp/'
local_file_path = os.path.join(local_directory, 'Z')

# Ensure the local directory exists
os.makedirs(local_directory, exist_ok=True)

# Download CSV file
s3_client.download_file(bucket_name, file_key, local_file_path)

# Load CSV into Pandas DataFrame
df = pd.read_csv(local_file_path)

# Clean up downloaded file
os.remove(local_file_path)
ls
contents = s3_client.list_objects(Bucket=bucket_name, Prefix='X')['Contents']
for f in contents:
    print(f['Key'])
4. Restore deleted files
If Version Control is enabled in S3 then deleted files will just have a tag Deleted Marker or similar. The idea is to remove these tags (link). To do this for many files at once first create a script that will list all the files to be restored:
echo '#!/bin/bash' > undeleteScript.sh

aws --output text s3api list-object-versions --bucket <bucket name> --prefix "Flagging Tool/" | grep -E "^DELETEMARKERS" | awk '{FS = "[\t]+"; print "aws s3api delete-object --bucket <bucket name>  --key \42"$3"\42 --version-id "$5";"}' >> undeleteScript.sh
Then just run the
chmod +x undeleteScript.sh
./undeleteScript.sh
finally remove it:
rm -f undeleteScript.sh