Host Web App
Connect to the instance
Connect to the instance using the following command. Replace <Your Public DNS(IPv4) Address> with your instance’s public DNS address.
chmod 400 myGPT.pem
ssh -i "myGPT.pem" ubuntu@ec2-54-151-28-127.us-west-1.compute.amazonaws.com
Now we install miniconda:
sudo apt-get update
wget https://repo.continuum.io/miniconda/Miniconda3-latest-Linux-x86_64.sh -O ~/miniconda.sh
bash ~/miniconda.sh -b -p ~/miniconda
echo "PATH=$PATH:$HOME/miniconda/bin" >> ~/.bashrc
source ~/.bashrc
Get the code from our repository and install the requirements.
git clone XYZ
pip install -r requirements.txt
Tmux
sudo apt-get install tmux
tmux new -s StreamSession  # create a new session called StreamSession
tmux list-sessions  # to discover sessions
tmux attach -t StreamSession  # to reatach
tmux kill-session -t StreamSession  # to kill session
To leave tmux session, press Ctrl+b and then d.
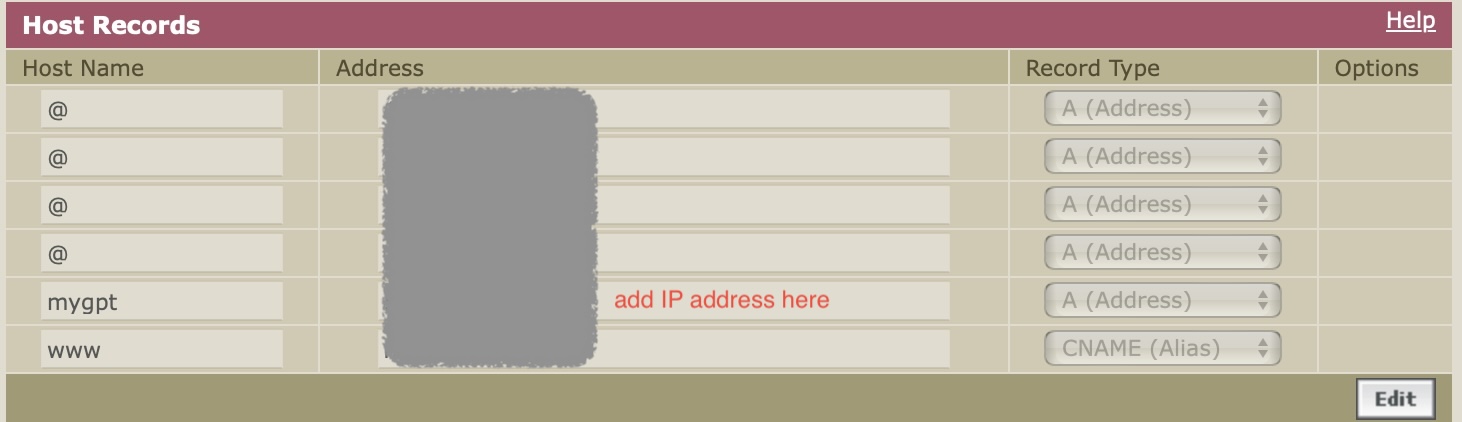
Add DNS name
One option is to add subdomain, for example mygpt.nenadbozinovic.com will now go to IP address of the EC2 instance. The port will be 80 by default.
Prep instance for remote control via aws ssm
First we need to assume user role, which is done by specifying AWS_ACCESS_KEY_ID and AWS_SECRET_ACCESS_KEY. And we need to make sure this user has the necessary permissions to send command, by attaching SendCommand policy to the user.
{
    "Version": "2012-10-17",
    "Statement": [
        {
            "Effect": "Allow",
            "Action": "ssm:SendCommand",
            "Resource": "*"
        }
    ]
}
We need to create keygen and add it to GitHub, checkout blog and add it the safe list:
git clone git@github.com:nesaboz/blog.git
sudo timedatectl set-timezone America/Los_Angeles  # set the timezone
timedatectl status
TZ='America/Los_Angeles' date
find . -name output.log
optional, we can add our repo directory (in my case blog) to the safe list:
sudo git config --system --add safe.directory /home/ubuntu/blog
ssh-keyscan github.com >> ~/.ssh/known_hosts  # add github.com to known hosts is obtained from output of: git remote -v
We also need to make sure instance can accept commands, this should be default and done by snap, double check it is installed, enabled, and active:
snap services amazon-ssm-agentWe need to run streamlit so we need to execute these commands:
git -C ~/blog pull
streamlit run ~/chatbot/myGPT.py --server.enableCORS false --server.enableXsrfProtection false
Note that --server.enableCORS false --server.enableXsrfProtection false reduces security but allows app to run on servers. One can get away running without the flags too.
At this point we should verify myGPT is running fine.
However, to run these commands remotely, it might seem easy, but there are few more things to do: - when we call git command remotely it will execute with different user, so we need to specify user, in this case ubuntu, - we need to kill the previous streamlit process, if it is running, since only one version counts when accessing URL (other apps would run at ports 8502 that are not even exposed), - we need nohup call so the process can run in the background (similar to tmux above), - we need to specify path to streamlit, since it is not in the PATH
- we should also redirect output to a file so we can see what is happening
So the command looks like this:
sudo -u ubuntu git -C /home/ubuntu/blog pull
sudo pkill -f streamlit
nohup /home/ubuntu/miniconda/bin/streamlit run /home/ubuntu/chatbot/myGPT.py --server.enableCORS false --server.enableXsrfProtection false
We should also append everything to a log file, and add a date to the beggining:
date > /home/ubuntu/output.log
sudo -u ubuntu git -C /home/ubuntu/blog pull >> /home/ubuntu/output.log 2>&1
sudo pkill -f streamlit >> /home/ubuntu/output.log 2>&1
nohup /home/ubuntu/miniconda/bin/streamlit run /home/ubuntu/chatbot/myGPT.py --server.enableCORS false --server.enableXsrfProtection false >> /home/ubuntu/output.log 2>&1
The > rewrites output.log and >> appends while 2>&1 redirects both stderr to stdout:
>> /home/ubuntu/output.log 2>&1Put it all together in aws ssm
So now that we have commands, let’s execute remote command using AWS Systems Manager (or aws ssm):
aws ssm send-command \
    --document-name "AWS-RunShellScript" \
    --targets "Key=instanceids,Values=i-08b8b6691ed2e1b6d" \
    --parameters commands="date > /home/ubuntu/output.log && sudo -u ubuntu git -C /home/ubuntu/blog pull >> /home/ubuntu/output.log 2>&1 && sudo pkill -f streamlit >> /home/ubuntu/output.log 2>&1 && nohup /home/ubuntu/miniconda/bin/streamlit run /home/ubuntu/chatbot/myGPT.py --server.enableCORS false --server.enableXsrfProtection false >> /home/ubuntu/output.log 2>&1" \
    --region us-west-1
We can now go to the remote machine and check the output.log:
(base) ubuntu@ip-172-31-18-61:~$ cat output.log
Thu Feb  8 17:56:43 PST 2024
Already up to date.
  Stopping...

Collecting usage statistics. To deactivate, set browser.gatherUsageStats to False.


  You can now view your Streamlit app in your browser.

  Network URL: http://172.31.18.61:8501
  External URL: http://54.151.28.127:8501
we can see what is running on the instance:
ps aux | grep -E "streamlit|PID"
kill <PID>  # if you need to
the output looks like this:
(base) ubuntu@ip-172-31-18-61:~$ ps aux | grep -E "streamlit|PID"
USER         PID %CPU %MEM    VSZ   RSS TTY      STAT START   TIME COMMAND
root       33774  0.1 13.9 623640 135188 ?       Sl   00:55   0:01 /home/ubuntu/miniconda/bin/python /home/ubuntu/miniconda/bin/streamlit run /home/ubuntu/blog/nbs/projects/myGPT/myGPT.py --server.enableCORS false --server.enableXsrfProtection false
ubuntu     33856  0.0  0.2   7004  2304 pts/0    S+   01:15   0:00 grep --color=auto -E streamlit|PID
the process with user root is the one that we started remotely, it is taking 0.1% of CPU and 13.9% of the memory.